Build image for raspberry pi using yocto
Summary
Yocto is a great tool to build linux-image for device. In this post i will summarize the procedure needed to build linux-image for raspberry pi B+ using yocto.
The following 2 types of disk image will be built:
- CUI : core-image-basic
- GUI X11 : core-image-sato
Addition software for the image
- OpenCV
- librealsense with python support
Build environment
| Tables | Detail |
|---|---|
| OS | Ubuntu-18.04 LTS |
| Processor | AMD |
| yocto | poky-warrior (2.7.1) |
Detail
The procedure is as followed
- Prepare the build environment
- Build the linux-image
- Results
1. Prepare the build environment
- Prepare the build environment
# Essential packages
sudo apt-get install gawk wget git-core diffstat unzip texinfo gcc-multilib \
     build-essential chrpath socat

# Download yocto
mkdir ~/tools
cd ~/tools
git clone -b warrior git://git.yoctoproject.org/poky.git poky-warrior

# Get useful layers
cd ~/tools/poky-warrior
mkdir layers
cd layers

git clone git://git.openembedded.org/meta-openembedded
# raspberry
git clone git://git.yoctoproject.org/meta-raspberrypi
# 96boards
git clone git://github.com/96boards/meta-96boards
# realsense
git clone https://github.com/IntelRealSense/meta-intel-realsense.git

source poky/oe-init-build-env rpi64-build
2. Build the linux-image
- Create the build directory
mkdir -p ~/workspace/poky-build
cd ~/workspace/poky-build

# Create the build directory inside rpi64-build
source ~/tools/poky-warrior/oe-init-build-env rpi64-build
- Add the layers to conf/bblayers.conf . the file content is as followed
POKY_BBLAYERS_CONF_VERSION = "2"

BBPATH = "${TOPDIR}"
BBFILES ?= ""

BBLAYERS ?= " \
  ${HOME}/tools/poky-warrior/meta \
  ${HOME}/tools/poky-warrior/meta-poky \
  ${HOME}/tools/poky-warrior/meta-yocto-bsp \
  ${HOME}/tools/poky-warrior/layers/meta-openembedded/meta-oe \
  ${HOME}/tools/poky-warrior/layers/meta-openembedded/meta-multimedia \
  ${HOME}/tools/poky-warrior/layers/meta-openembedded/meta-networking \
  ${HOME}/tools/poky-warrior/layers/meta-openembedded/meta-python \
  ${HOME}/tools/poky-warrior/layers/meta-openembedded/meta-perl \
  ${HOME}/tools/poky-warrior/layers/meta-openembedded/meta-gnome \
  ${HOME}/tools/poky-warrior/layers/meta-openembedded/meta-xfce \
  ${HOME}/tools/poky-warrior/layers/meta-raspberrypi \
  ${HOME}/tools/poky-warrior/layers/meta-96boards \
  ${HOME}/tools/poky-warrior/layers/meta-intel-realsense \
  "
- Add the following lines to conf/local.conf.
# Select machine
# See https://github.com/agherzan/meta-raspberrypi/tree/master/conf/machine
# for a list of available machine
MACHINE = "raspberrypi3-64"

# Make faster
BB_NUMBER_THREADS = '6'
PARALLEL_MAKE = '-j 6'

# useful software
CORE_IMAGE_EXTRA_INSTALL += "htop iotop iperf3"

# OpenCV
# NOTE: OPENCV_contrib is already include inside opencv package
# add libopencv-XXX to insert new module
CORE_IMAGE_EXTRA_INSTALL += "opencv \
                            libopencv-core-dev \
                            libopencv-highgui-dev \
                            libopencv-imgproc-dev \
                            libopencv-objdetect-dev \
                            libopencv-ml-dev \
                            opencv-apps \
                            opencv-dev \
                            libopencv-xphoto \
                            opencv-dev "

# realsense : need x11
CORE_IMAGE_EXTRA_INSTALL += "librealsense2 librealsense2-tools"
CORE_IMAGE_EXTRA_INSTALL += "librealsense2-debug-tools"

# Image size will be extended to fill up the sdcard
CORE_IMAGE_EXTRA_INSTALL_append = " 96boards-tools "

# Fix bug: some package is licensed so it won't be built by default
LICENSE_FLAGS_WHITELIST = "commercial"

# Add new user : pi/raspberry
# change password of root into root
EXTRA_USERS_PARAMS = " useradd pi; \
                       usermod  -p 'raspberry' pi; \
                       usermod  -a -G sudo pi; \
                       usermod -P root root; "
- For intelrealsense: create conf/auto.conf with the content as followed
require include/intel-librealsense.inc

# Python 2.x
CORE_IMAGE_EXTRA_INSTALL += "python-pyrealsense2"

# Python 3.x
CORE_IMAGE_EXTRA_INSTALL += "python3-pyrealsense2"
- Start the build
# CUI image
bitake core-image-base

# GUI X11 image
bitbake core-image-sato

# GUI Wayland/Weston
# bitbake core-image-wayland
Note: The build will take hours to finish.
3. Results
The following image will be created
# CUI image
tmp/deploy/images/raspberrypi3-64/core-image-base-raspberrypi3-64-20190928135901.rootfs.rpi-sdimg

# GUI X11 image
tmp/deploy/images/raspberrypi3-64/core-image-sato-raspberrypi3-64-20190928134950.rootfs.rpi-sdimg
We then use dd command to wride sdimg file into sd card
sudo dd if=core-image-base-raspberrypi3-64-20190928135901.rootfs.rpi-sdimg of=/dev/sdX bs=4M status=progress
sync
3.1 CUI image result
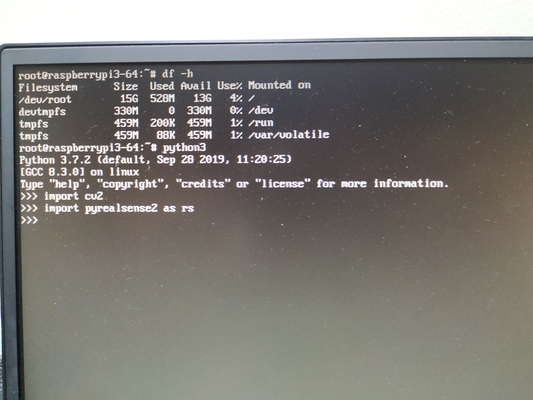
It can boot into CUI
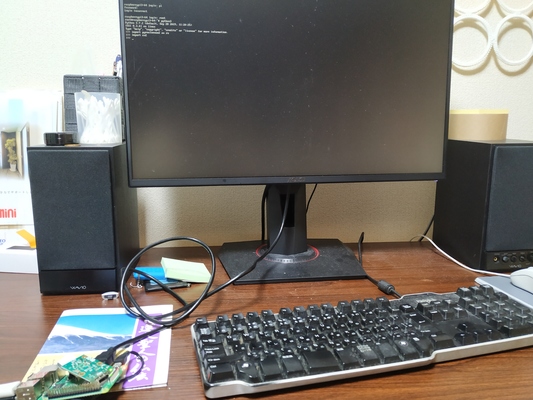
Opencv and pyrealsense was installed correctly
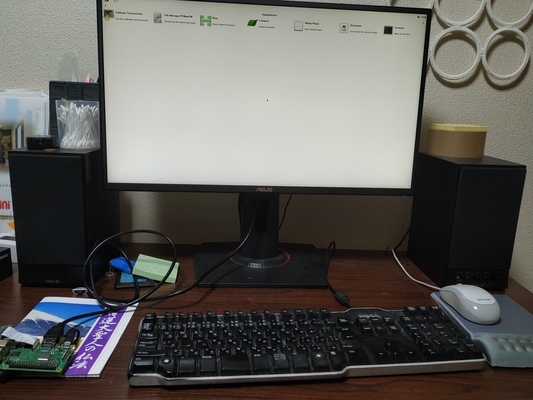
3.2 GUI X11 image
It can boot into GUI
References
- Bake 64-bit raspberryPI3 images with Yocto/OpenEmbedded
- Yocto で RaspberryPi3 OS を3種類の方法で build する
- YoctoProject Release Activity
- rpi-basic-image (CUI)
- core-image-sato (GUI, X11)
- core-image-weston (GUI, Wayland/Weston(desktop-shell))
End
Leave a comment